A Comprehensive Guide on How to Animate for Beginners with AI [2025]
Updated December 16, 2024
Published May 9, 2024
![A Comprehensive Guide on How to Animate for Beginners with AI [2025]](https://cdn.sanity.io/images/isy356iq/production/aa90643b69264f10a037f38e6a61fcc7fb2ef232-1200x800.jpg?h=260)
You want to learn how to animate but can’t draw?
No problem!
Animation is more than just drawing, and AI makes it even easier to bring your visions to life. Whether you want to animate your sketches or create a short movie, AI has tools that can help you achieve your goals.
We’ll explain everything a beginner needs to know about animating like a pro without any prior skills. We’ll cover the basic principles, show you how to create a storyboard with AI, and provide all the essential tips and tricks to get you started.
If creating your own animated shorts sounds appealing, Let’s dive into the universe where creativity meets technology!
What is Animation?
Animation is like a magic trick that brings pictures to life. When you watch a cartoon or a movie, what you’re seeing is a bunch of still images that change very quickly to make it look like everything is moving. This is the basic idea behind animation.

Via Disney
You might think of big names like Disney, Pixar, or Studio Ghibli when you hear “animation.” These studios are famous for creating worlds that feel alive, which is exactly what animation is all about: bringing life to pictures.
In the old days, animators drew each frame by hand on clear sheets called cels, and then they took pictures of these drawings to make a film. Now, most animations are made with computers, which help make the images move smoothly and look more realistic.
Thanks to AI, making animations has become easier. AI can help create scenes or characters with just a little help from a person, which means even if you’re not good at drawing, you can still make animations.
Animation isn’t just for cartoons. It’s used in movies, video games, and even ads we see on TV and online. With AI, more people can try animation and share their stories in fun and creative ways.
Different Types of Animation
Animation is a diverse and evolving field, and it can be categorized into several distinct types, each with its own techniques and uses. Here are some of the major types of animation:
- Stop Motion: This technique involves manipulating real objects in small increments between individually photographed frames, creating the illusion of movement when the series of frames is played as a continuous sequence. A well-known example of stop motion is the “Wallace and Gromit” series. Stop motion is often chosen for its tactile charm and the unique depth it brings to physical objects, making it popular for both artistic films and commercial advertisements.
- 3D Animation: Using computer software, artists create lifelike three-dimensional characters and environments. This technique is famously used in movies like “Toy Story.” 3D animation is preferred when detailed environments, realistic textures, and dynamic characters are needed, especially in feature films and video games.
- Motion Graphics: This type of animation involves creating moving graphic elements, often used in advertisements, web banners, and video titles. The dynamic and engaging graphics seen in news broadcasts are examples of motion graphics. Motion graphics are ideal for conveying information in a direct and appealing way, making them excellent for educational content, corporate presentations, and online media.
- 2D Animation: Characters and scenes are created in a two-dimensional space, using only height and width. This style is exemplified by classic cartoons such as “The Simpsons.” 2D animation is favored for its classic aesthetic and efficiency in storytelling, particularly in television animation and web series.
- Traditional Animation: Also known as cel animation, this old-school method involves drawing each frame by hand on transparent sheets called cels. Classic “Mickey Mouse” cartoons are iconic examples of traditional animation. Despite being labor-intensive, traditional animation is still used for its unparalleled artistic expression and nostalgia factor, often in artistic shorts and specialty projects.
Each of these types has its specific applications and is chosen based on the effect the animator wishes to achieve. As technology advances, new forms of animation continue to emerge, blending various techniques and expanding creative possibilities.
The Basics of Animation
It’s essential to first understand the basics of animation to fully unlock your creative potential. It’s like learning the theory behind the music before you can compose a masterpiece!
Let’s get into the 12 principles of animation, making them easy to understand and engaging if you are interested in the art of bringing drawings to life.
Squash and Stretch: This principle gives objects and characters a sense of weight and elasticity. For example, when a bouncing ball hits the ground, it squashes (flattens) and stretches (elongates) as it bounces back up. This makes the animation feel more dynamic and alive.

Via Giphy
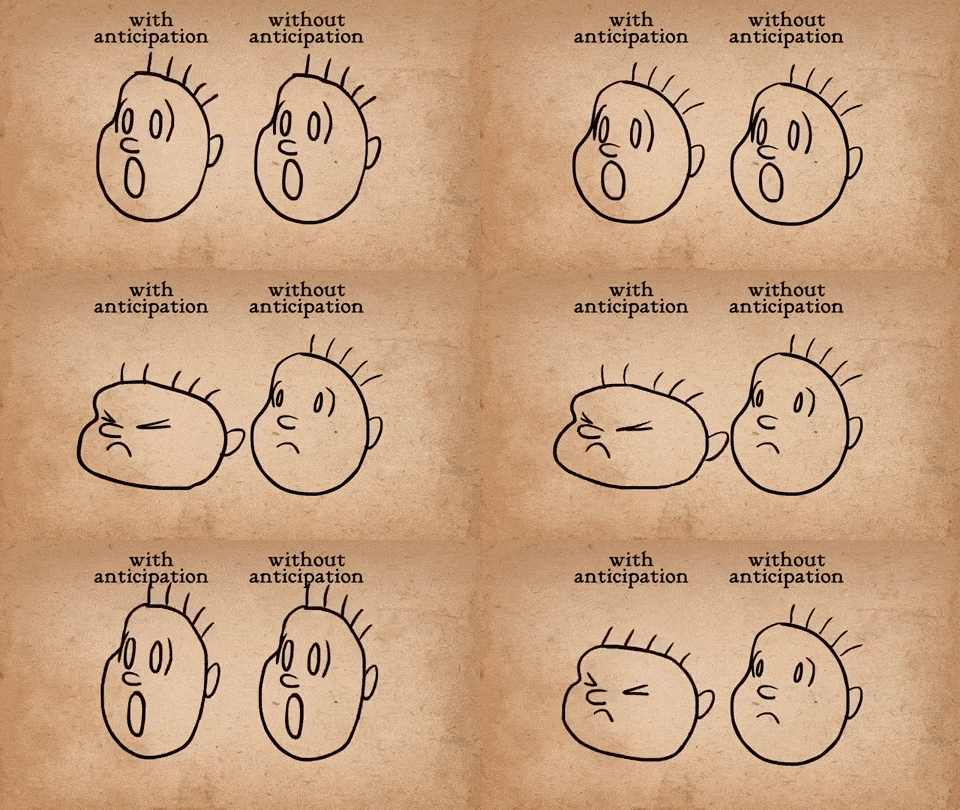
Anticipation:This helps viewers expect a forthcoming action. Before a character jumps, you might see them bend their knees first. This buildup makes the resulting action appear more realistic and gives the animation a natural flow.
Via Gifs
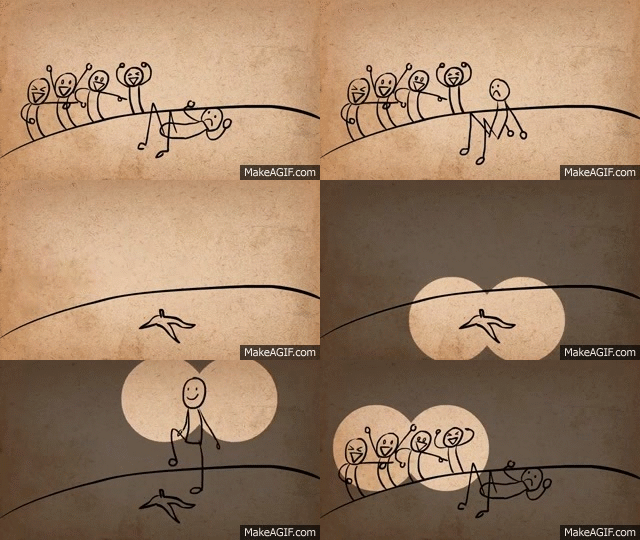
Staging: Similar to directing a play, staging in animation involves positioning characters and setting up scenes so that the viewer’s attention is focused on what’s important. This could mean using lighting, camera angles, or background elements to highlight key actions or emotions.
Via Makeagif
Straight Ahead Action and Pose to Pose: These are two approaches to drawing animations. ‘Straight ahead action’ means creating each frame one after another to capture a fluid motion, while ‘pose to pose’ involves starting with key frames and then filling in the details. This can help manage the animation’s pacing and emotional impact.

Via Makeagif
Follow Through and Overlapping Action: These principles add realism by showing how parts of the body continue to move after the character has stopped. For example, when a character stops running, their hair might keep swinging for a moment. This mimics the natural movement of objects and body parts.

Via Makeagif
Ease In, Ease Out: Movements in the real world start slowly, speed up, and then slow down again. By adding more frames at the beginning and end of an action, animations mimic this natural motion, making them smoother and more lifelike.

Via Lara’s blog
Arcs: Most natural movements follow a curved path. Animators use arcs to create fluidity in movements, whether it’s a person walking or a ball being thrown. This principle avoids robotic, linear motions in animations.

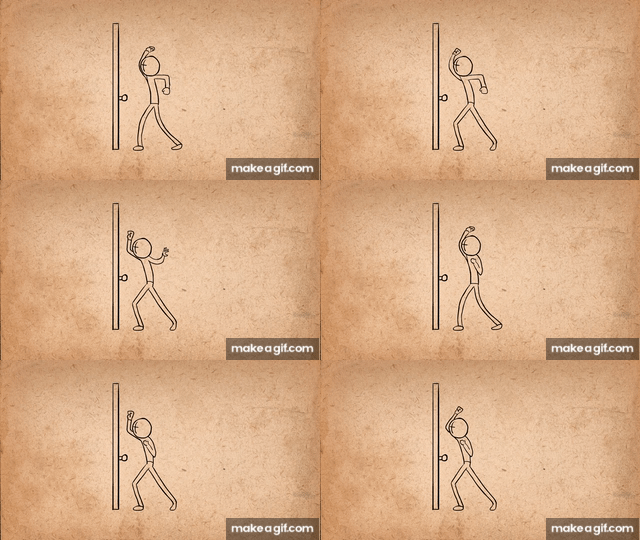
Secondary Action: This adds to the main action with additional, smaller movements that help to flesh out the main action. For example, a character might sigh or fidget with an object while talking, adding depth and realism to the scene.
Via Makeagif
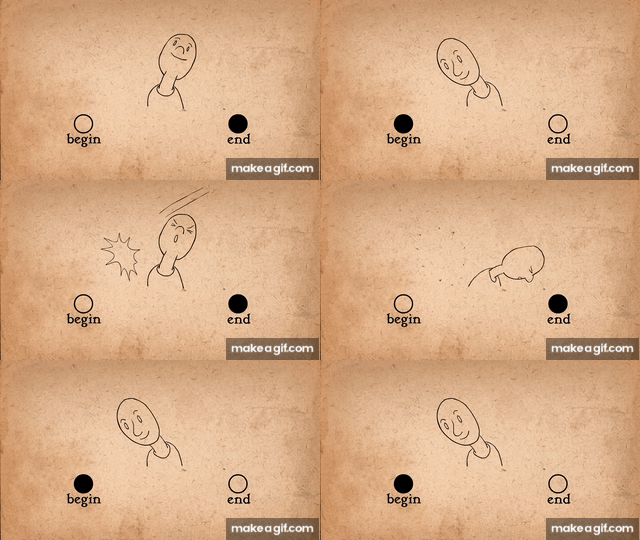
Timing: Proper timing is crucial to making animations feel believable. It affects how quickly or slowly actions occur, which in turn influences the animation’s mood and believability. Timing can make the difference between a comedic and a dramatic scene.
Via Makeagif
Exaggeration: While realism is important, exaggeration can enhance animations by making them more expressive and impactful. For example, exaggerating a character’s facial expressions can effectively convey their emotions, making the animation more engaging.

Via Makeagif
Solid Drawing: This principle focuses on making sure that every frame looks believable with consistent volume, weight, and anatomy. Solid drawing skills are essential for animators to bring characters to life in a three-dimensional space.
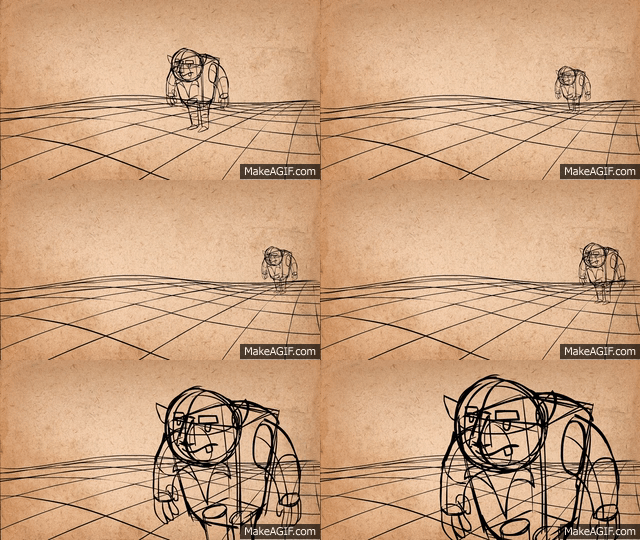
Via Makeagif
Appeal: Every character, regardless of their role, should have a charisma that makes the audience care about them. This involves using design elements such as expressive faces or engaging body language that make characters relatable and memorable.
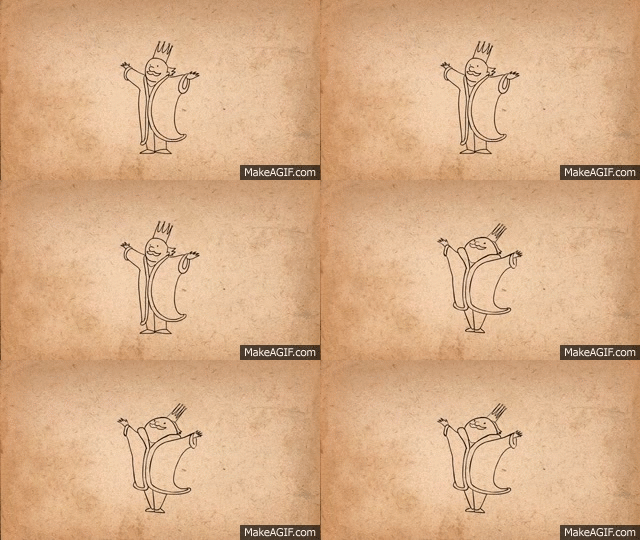
Via Makeagif
Understanding and applying these 12 principles can transform simple drawings into lively, compelling animations that tell a story and evoke emotions, just like the beloved characters created by Disney.
How to Animate with AI Like a Pro for Beginners
Animating might sound like you need years of practice to be like a pro, especially if you’re just starting out.
However thanks to advancements in AI, animation is becoming more accessible.
Industry giants like Jeffrey Katzenberg from DreamWorks suggest that AI could reduce animation production costs and time by up to 90%.
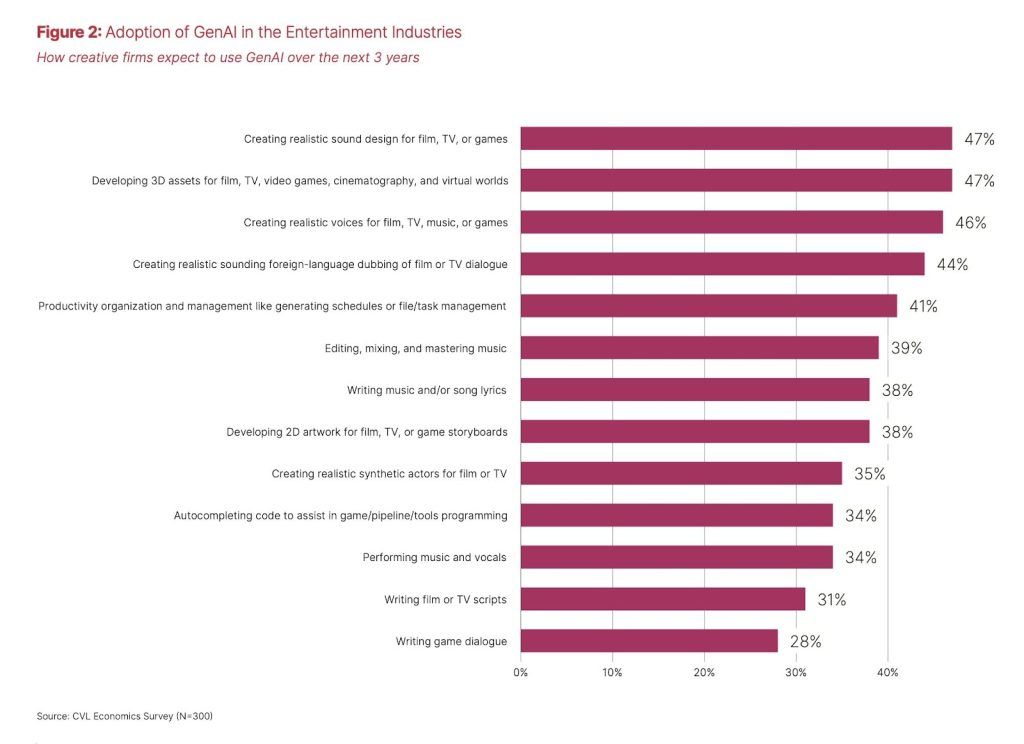
Via Cartoon Brew
So even if you’re just starting out, you can make animations that used to require a whole team of artists.
We’ll walk you through simple steps to get you started on how to animate with AI, making it fun and straightforward.
Step 1: Visualize Your Idea
Before you start animating, it’s good to have a clear vision of what you want to create. This could be a story you’ve been thinking about or a concept that intrigues you. Start by sketching your ideas on paper or writing a brief outline.
If you don’t know how to draw out your ideas, you can use AI tools like ChatGPT to help develop your initial ideas. For example, we gave the AI a description of a scene, and here’s how it turned out.
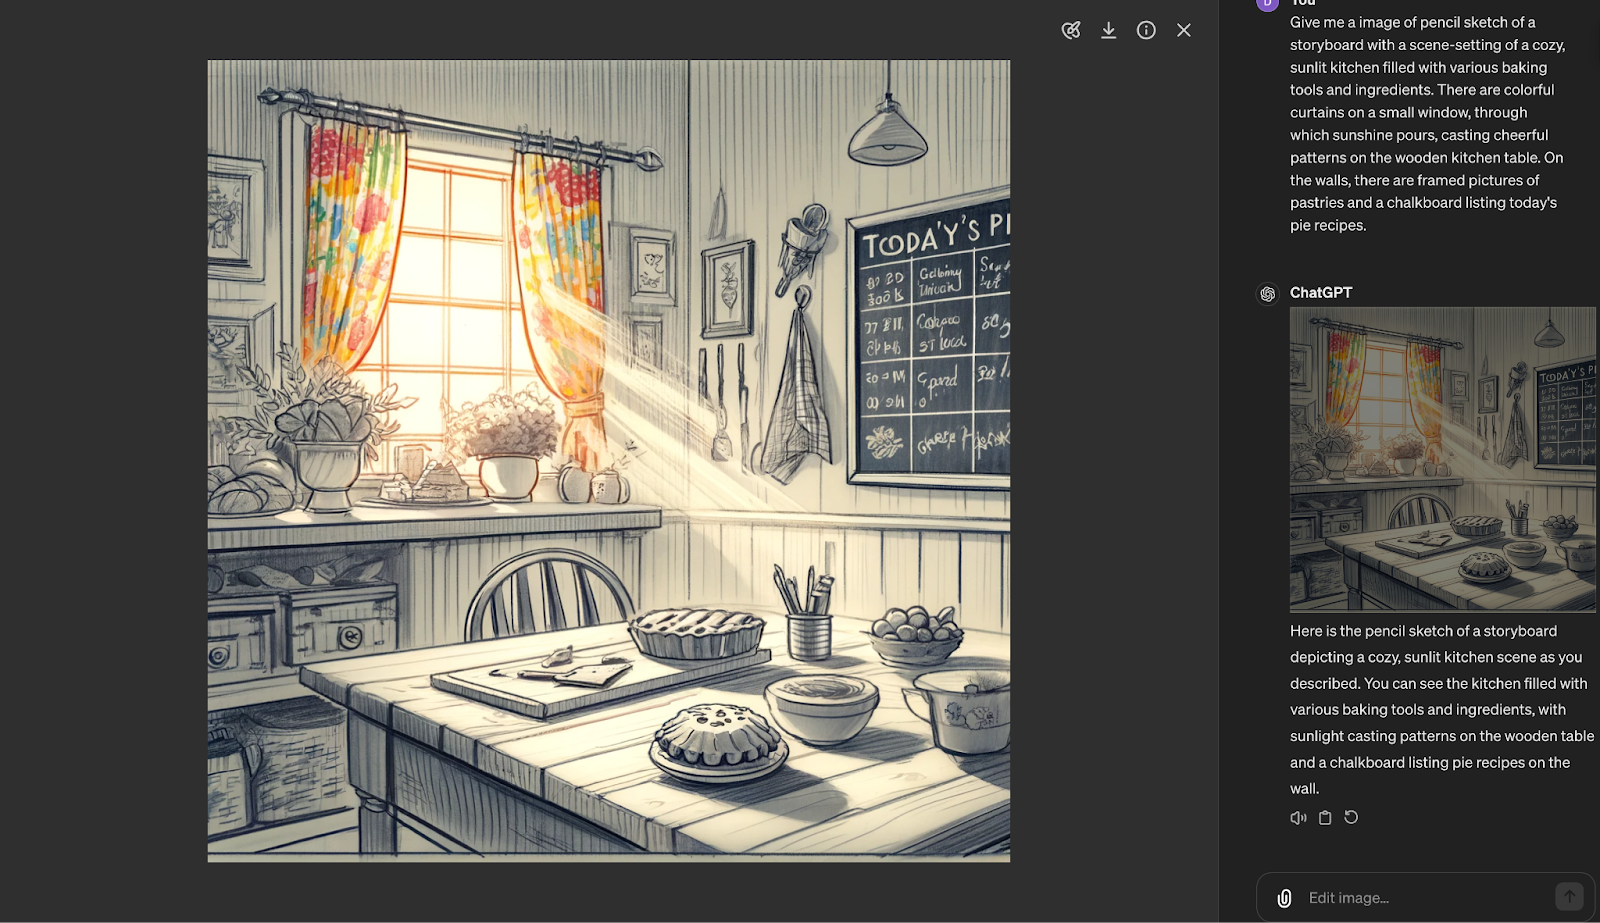
If you want to further develop the story to the next scene, you can do that as well.
During our test, we continued to develop the storyline by adding a character from the previous scene. It was remarkable how, using the same angle and room setting, the AI managed to accurately create the next scene with details.
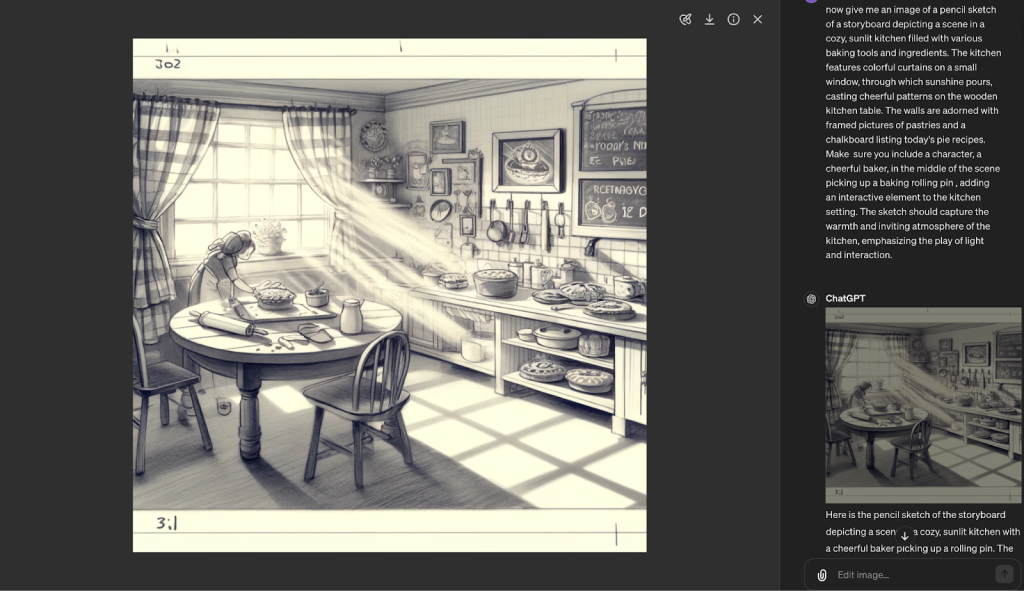
As you can see from our test, we simply transformed our initial ideas into text and input them into ChatGPT, and in under a minute, our storyboard for the animation was brought to life.
When you have great ideas, start writing them down in detail. You can use ChatGPT to further enhance them, and voilà, you get your animation storyboard!
Step 2: Choose Your Software
Selecting an AI animation tool that fits your project’s needs is essential. For practical application, consider using traditional tools for their precision and depth, while incorporating AI tools to expedite repetitive tasks and add intelligent features.
For instance, Runway ML is an example of an AI tool that animators can integrate into their workflow to simplify complex animations and enhance creative processes.
Here is an example of how we used Runway ML to turn our previous AI-generated scene from an idea into an animation.
Together, they create a comprehensive setup that is ideal for animators looking to blend artistic control with technological innovation.
Step 3: Create or Import Assets
Your animation needs characters, backgrounds, and possibly other objects. If your AI tool allows, you can create these assets directly within the tool or import them if you’ve designed them elsewhere.
For example, we used ChatGPT to create a character that would fit into the scene we developed and used in our video. We were quite impressed with the result, as it only took us a few minutes to achieve this consistent look of moving animation.
Explore the AI tool’s library or use its features to generate assets from sketches or descriptions. This is where your characters and scenes start to take shape visually.
Step 4: Animate Your Scenes
With your assets ready, you can start animating. Use the AI tool to apply movements to your characters and elements in the scene.
For example, we used a motion brush in Runway ML and applied it to our previous scene to add some movement, and this is how it turned out.
There are more AI tools that can help automate animations, such as walking cycles or facial expressions, depending on your needs. These features can save time and create natural-looking movements like a pro.
Step 5: Add Audio Elements
Next step is to enrich your storytelling by trying to add voice overs, music, and sound effects. Many AI tools offer libraries of sound assets for this purpose, or you can upload your own.
You can also use AI music generators to create original music tailored to the style you want for your animation.
To increase the realism of your characters, incorporate dialogues that utilize AI features to automatically synchronize lip movements with spoken audio.
Step 6: Edit and Refine
Review your animation to ensure it flows well and conveys your story or concept effectively. Look for any areas that need improvement, such as timing, pacing, or visual effects, and make the necessary adjustments. Take advantage of the AI tool’s editing features to fine-tune your animation, adjusting timings and enhancing visual effects to better tell your story.
Step 7: Export and Share
Once you’re satisfied with your animation, now is time to share! Export it in the appropriate format for your intended audience and start engaging with your audience to receive feedback and make connections.
Follow these steps to solidly start bringing your ideas to life. Whether you have an idea you want to pitch that needs a quick vision board, or you’re just interested in learning animation in your own time, these tips and tricks will give you plenty to experiment with and help you enter the field.
Tips and Tricks to Get Better at Animating Fast
With the help of AI, animating fundamental details such as lighting and movement can still be complex skills to master. However, with the right approach, you can improve quickly and have fun along the way. Here are some practical tips and tricks to help you get better fast.
Observe Real-Life Movements
One of the best ways to understand animation is to observe how things move in real life. Watch how people express emotions through gestures, how animals move, or how objects fall. You can record videos of movements that interest you and use them as references for your animations. This practice helps you capture realistic motions and timings.
Start with Simple Exercises
Begin with basic animation exercises that don’t require intricate details. Animating a bouncing ball or a simple walk cycle can teach you fundamental principles like timing, squash and stretch, and anticipation. These exercises build your confidence and skills without overwhelming you.
Analyze Professional Animations
Spend time watching professional animations and study them closely. Use tools to slow down videos to understand frame-by-frame movements. This analysis helps you see how professionals apply animation principles and can inspire your techniques.
Practice Recreating Animations
Try to replicate scenes from your favorite animations. This exercise is not about creating original content but about understanding how other animators solve problems and achieve effects. Recreating work helps you learn new techniques and understand the workflow of animation.
Choose User-Friendly Software
Select animation software that matches your skill level. Invest a little bit of time in getting to test around animation tools through their tutorials or guides. Understanding how to leverage both AI-driven and traditional features will maximize your creative potential and efficiency.
Experiment with Animated GIFs
Creating animated GIFs is a fun and manageable project for beginners. GIFs require only a few frames, so they are perfect for practicing and sharing small animations. This format is excellent for experimenting with ideas quickly.
Design with Animation in Mind
If you create your illustrations, design them to be animation-friendly. Simplify details and think about how parts of the illustration will move. This foresight saves time during the animation process and leads to smoother animations.
By incorporating these tips into your practice, you can accelerate your learning
Final Takeaway
As we conclude this guide on how to animate with AI for beginners, it’s clear that the field of animation is not only accessible but also full of potential for creativity and expression. By embracing AI tools, even those without traditional animation skills can bring their visions to life.
We are excited to see what you create. Tag and follow us on Twitter, and you might get selected to receive one month free on a paid plan for the AI tool you used for your video.
Share This Post
Della Yang
Della Yang is a marketing professional with a passion for the ever-changing digital landscape. She frequently writes tech news and reviews, sharing her knowledge and insights through blogs and various online platforms.
Allow cookies
This website uses cookies to enhance the user experience and for essential analytics purposes. By continuing to use the site, you agree to our use of cookies.
