ClickUp Tutorial for Beginners: A Step-by-Step Guide
Editorial Note: We earn a commission from partner links. Commissions do not affect our editors' opinions or evaluations.
Updated July 16, 2024
Published July 27, 2023
ClickUp is a powerful project management software with unparalleled productivity-enhancing functionalities individuals and teams can use to get more work done faster.
But like all effective all-in-one PM tools, ClickUp’s robust, bulky, and feature-rich user interface makes it an app with a learning curve.
That’s why, in this ClickUp tutorial, we intend to guide you through the ups and downs of getting started on ClickUp. All you’ve to do is stay tuned!
ClickUp Onboarding: 11-Step Guide
Let’s begin with how you can sign-up on ClickUp.
On ClickUp, moving from a newbie project manager to a seasoned admin is quite easy. Indeed it requires a learning curve, but nothing too extra.
Here’s an 11-step guide through the process.
Step 1: Choose a Plan or Get Started for Free
There are two ways to get started on ClickUp. You can choose a plan from the get-go or sign up as a free user.
ClickUp’s free forever plan allows users to
- Create unlimited tasks,
- Enjoy real-time chats,
- Supports native time tracking,
- Offers 24/7 customer service and lots more.
The free plan is best for maintaining communication with a close-knit team or keeping track of to-dos.
However, if you want to manage a more sophisticated workflow, you might want to get started on any of ClickUp’s four-tier paid plans.
Step 2: Sign Up Using Your Work Email
ClickUp’s sign-up process comes with zero hiccups.
It’s effortless, intuitive, and straightforward. Plus, the fervent splash of colors and aesthetically pleasing UI makes the experience memorable.
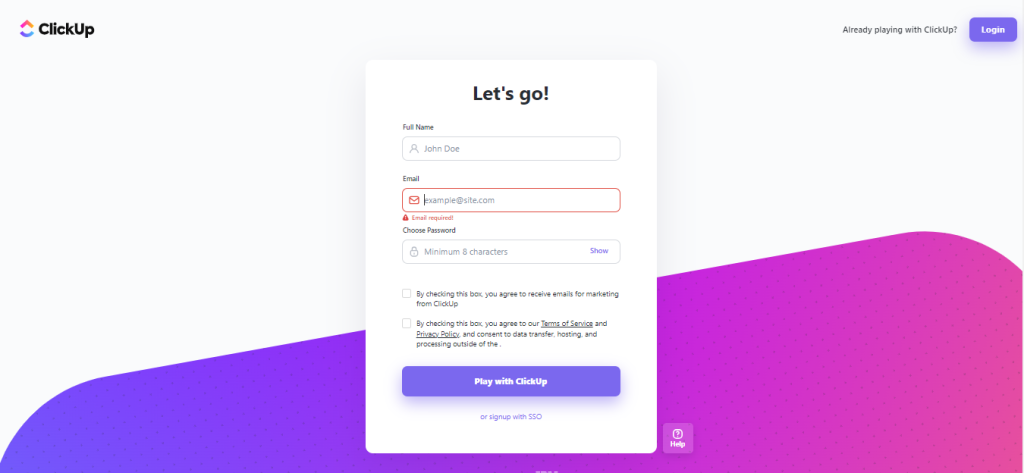
Click the “Sign-up” button, and you’ll find yourself on a landing page like the one below.

As soon as you enter your work email, you will be redirected to a second sign-up page prompting you to provide personal details such as name and password.
Fill out the form, and ClickUp will email you a 4-digit confirmation code. Once the code is verified, you can log in to optimize your workspace further.
Step 3: Name Your Workspace
Log in to ClickUp for the first time, and you’ll be faced with multiple no-brainer questions.
Naming your workspace is the first of many.
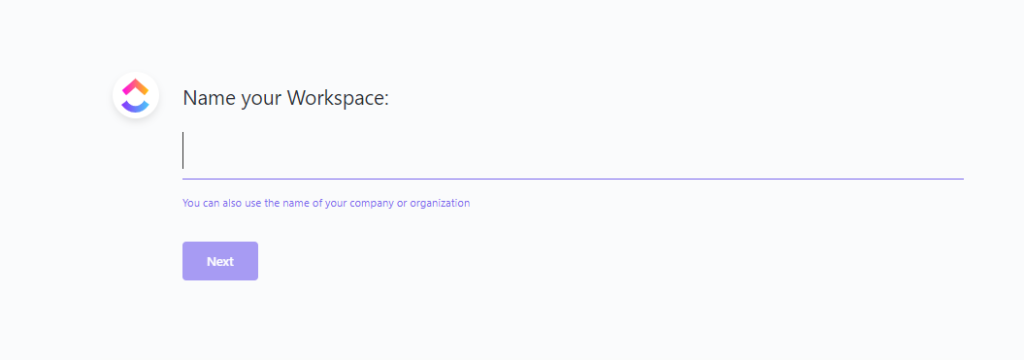
While you can use any name—your name, your organization’s, or anything in between—know that each time you log in to your account, invite a team member, or contact support, this name will represent you.
But hey! No need to make the workspace naming process a big deal; you can always change the name later.
Step 4: Choose an avatar
Choosing an avatar might not be as fun as it sounds if you limit yourself to ClickUp’s color pallets fused with a pictorial alphabet.
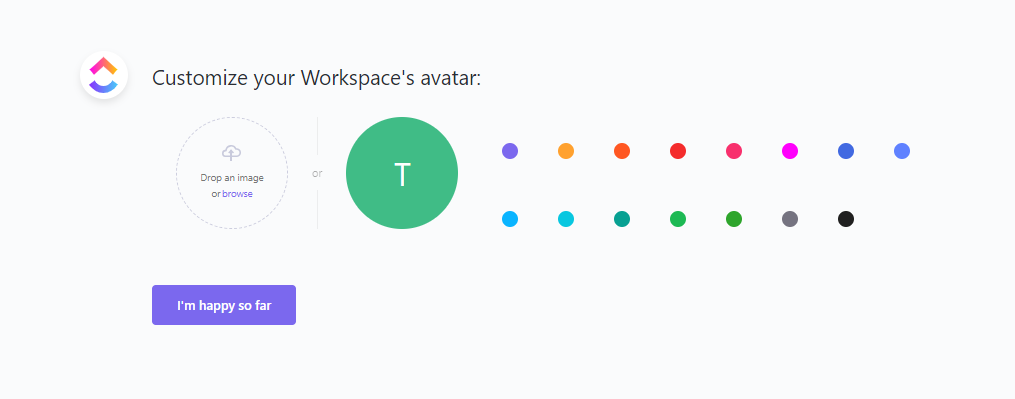
You can use the “drag an image or browse” option to throw into the mix an old yet evergreen image of you or your team members. Or something more unforgettable.
Step 5: Pick Theme Color
Picking a ClickUp theme color comes next. This is a simple exercise that you can’t get wrong.
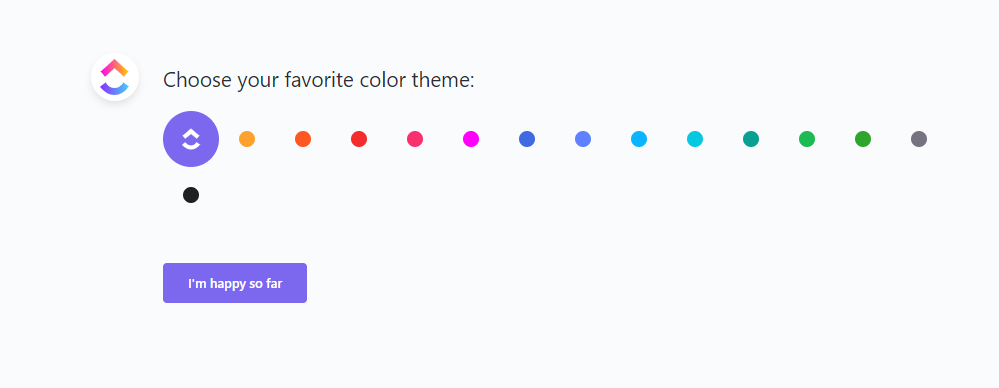
Indeed, the theme color you decide to use will determine the general aesthetic of your workspace.
But that’s no cause for alarm. Whatever you pick, whichever theme color you choose, it’s perfect. Move on.
Step 6: Select Workspace & Team Size
How many people are on your team? Or, better still, how many people do you intend to invite to your project management hub? 2, 10, 50?
Don’t worry; you don’t need to be extra specific. An estimate will do.
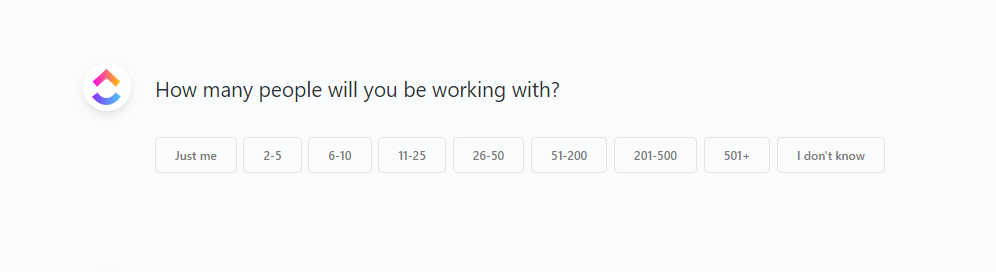
Select the “Just me” option if you’re a one-person workforce. And on the off chance that you have no idea, click on “I don’t know.” Your honest opinion is all that matters.
Step 7: Select use case
What do you need ClickUp for?
To maintain your in-house support team, manage a robust network of remote IT workers, onboard new marketing hires, or something else?
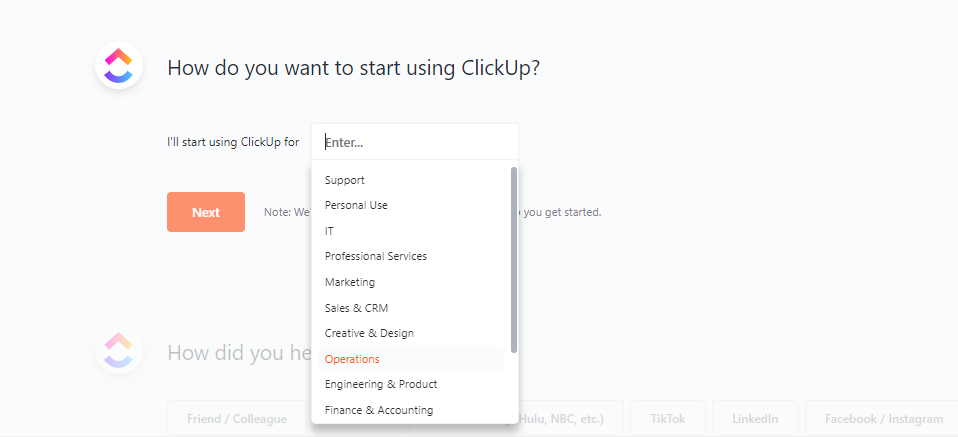
Well, whatever it might be, highlight it.
Selecting a use case helps ClickUp recommend templates and tools that make your journey fuss-free.
Step 8: Survey Info (How did you hear about us?)
Now this is the only ClickUp onboarding question that doesn’t directly influence the look and feel of your workspace.
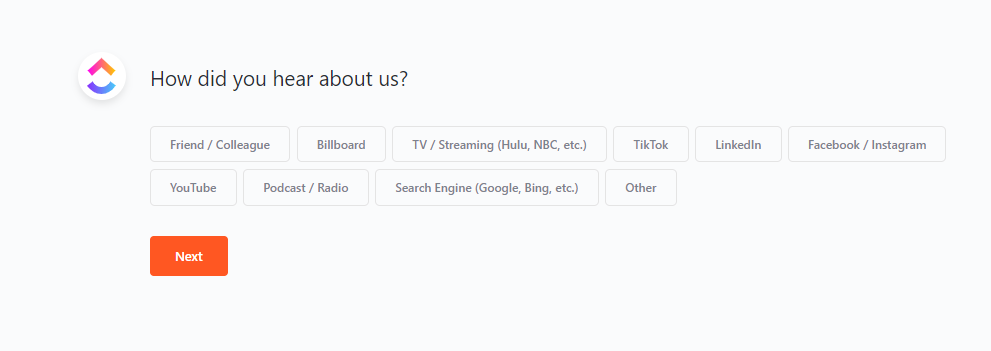
Highlighting how you heard about ClickUp is a choice question; you can skip it if you want.
However, providing an accurate answer here can help ClickUp’s marketing team maximize marketing spend and attract more productive folks like you.
Step 9: Invite team members
It’s time to get team members and other interested parties to join your ClickUp workspace.
If you have got an email list, simply copy and paste it.
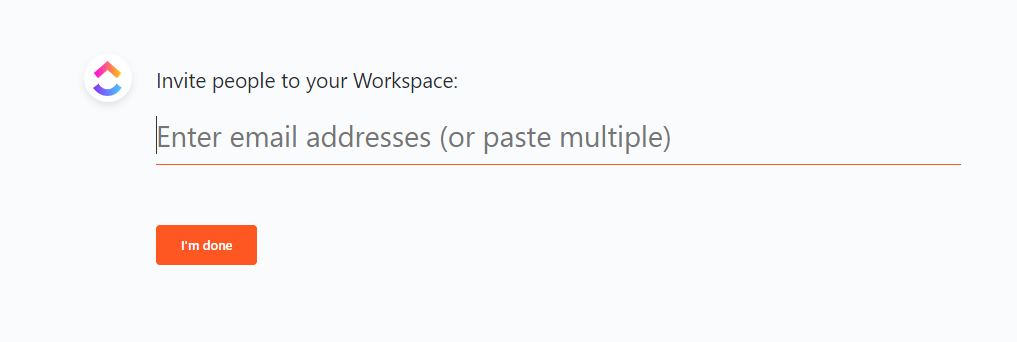
Note that this is a plain invitation process that doesn’t allow you to customize the proportion of access each invitee has.
Step 10: Enable ClickApps
Before you enable ClickApps, you might want to know what they mean.
ClickUp, as you already know, is an all-in-one project management tool that aims to provide users with all they need to manage work in one platform.
ClickApp is a product of this goal.
ClickApps, unlike integrations, are in-app ClickUp functionalities providing the flexibility needed for limitless customization.
After inviting team members, you’ll be prompted with a handful of ClickApps. This list is not comprehensive, so if none of the ClickApps highlighted interest you, simply skip.
We’ll talk about how you can find and enable ClickApps in the how-to guide section.
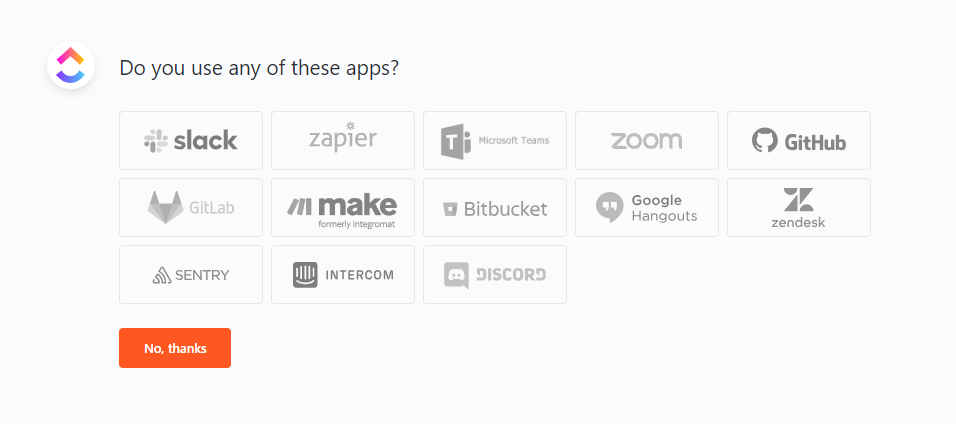
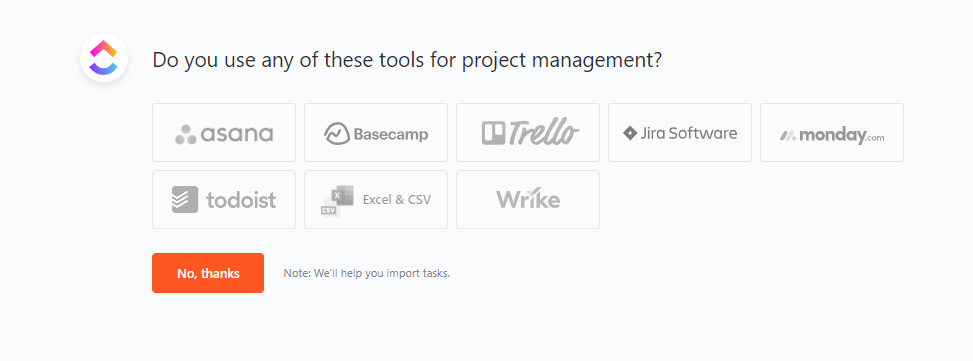
Step 11: Enable Integrations
Enabling third-party tools is the final step of ClickUp’s onboarding process.
If you use tools like Asana, Trello, and the like, and need to import tasks or workflows, here’s where the magic happens.
Again, this list is in no way comprehensive. ClickUp highlighted a few integrations to avoid overwhelming users—more on adding integrations in the how-to guide section.
Voila! That’s a wrap on ClickUp onboarding. You will be greeted with a final welcome message “Now it’s time to go change the world. Don’t forget to have fun.” then redirected to its project management hub.
ClickUp Hierarchy: Understanding How ClickUp Works
For you not to be overwhelmed by the feature-rich homepage you’ll come across as soon as you finish onboarding, let’s discuss how ClickUp works.
ClickUp follows a hierarchical pattern. It begins with workspaces and ends with tasks.

The hierarchical pattern makes it easy for users to fluidly define their workflow, map their business into terms and processes, and get more work done faster.
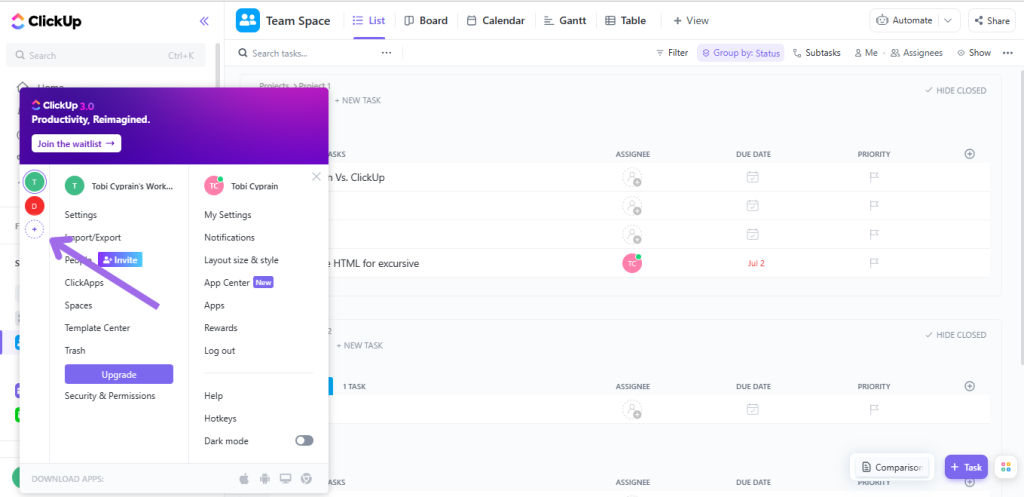
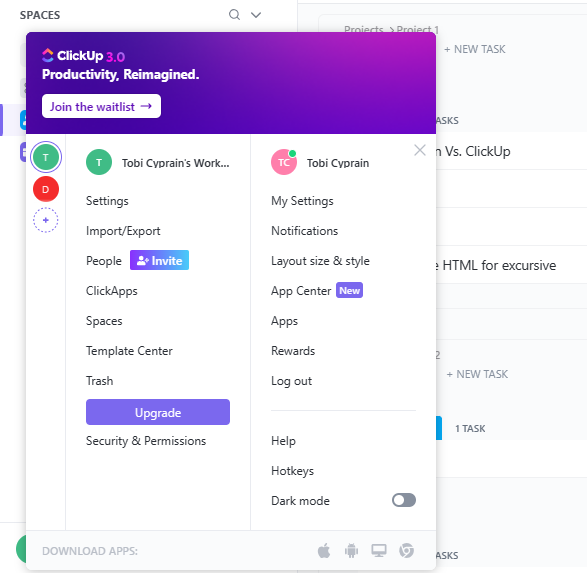
How to Create a Workspace
Workspace is the highest level of ClickUp’s hierarchy. It’s where spaces, folders, lists, tasks, and checklists live.
To create a workspace, click on your “profile avatar” in the lower left corner of your screen. You’ll be graced with a side page similar to the one below.
Look at the edge of the side page for a “+” icon circled with dotted lines; click on it, and you’re well on your way to creating a customized workspace.
Anyone with a ClickUp account can create a workspace, regardless of whether you’re an admin. But only members of a workspace can access information on it.
While a ClickUp workspace is robust and can house hundreds of workflows (in the form of spaces), you can’t move info between two or more workspaces.
How to Create a Space
ClickUp space is the second level in the ClickUp structures—they exist within workspaces to help managers break down organizations into different departments, teams, or groups.
Spaces determine how complex or simple your work needs to be. It allows team members to share work and stay updated on tasks.
To create a space, choose the workspace you would like to get work done on and click on the “+ New Space” icon at the left corner of the navigation pane.
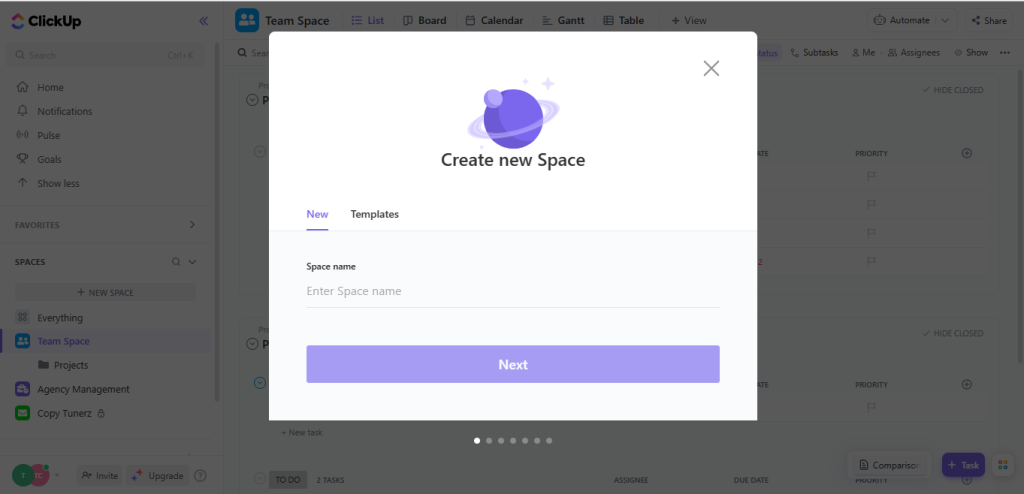
You can choose a space template or manually customize your ClickUp space with ClickApps to take on a specific look and feel.
How to Create Lists
In the ClickUp hierarchy, after spaces come lists. Lists stand in the middle, holding all the tasks within a space. They serve as a storage facility for tasks.
To create a list, hover over the “+” icon close to an existing space; multiple options, including “create a list,” will pop out.

Depending on the task or project you want to accomplish, you can set up your list using templates or manually configure the whole thing.
How your list appears is broadly influenced by the ClickUp view you choose. While ClickUp offers a “List view,” which separates tasks by a list categorically arranged under your space, there’s also the Gantt view, broad view, team view, task view, etc.
How to Create Folders
Just like lists hold tasks, so do folders hold lists.
ClickUp folders help project managers create a more granular organizational structure.
The steps involved in creating a folder are the same as creating a list. Hover over the “+” icon close to an existing space and choose “folder,” you’ll find yourself with a page similar to the image below.
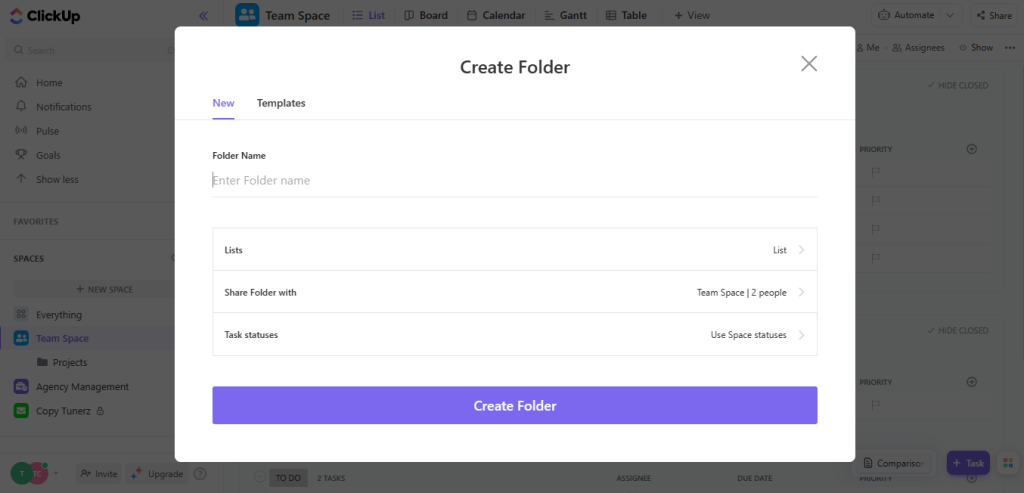
Name your folder, then click the selectable options to add a list, include team members’ emails, and update task status.
Folders allow you to use “red, amber, or green” colors to prioritize projects and keep team members informed about the status of lists in a folder.
Note that ClickUp folders cannot directly contain tasks. You can only use them to house multiple lists.
How to Create a Task
Task is the lowest level of the ClickUp hierarchy but the most significant.
Without the ClickUp task option, you won’t be able to create, assign, or manage projects within a workspace.
It’s where everything begins.
Tasks house the items that must be completed in a project, the milestones that must be reached, steps that must be taken, and goals that must be met.
To create tasks, click the “+ Task” icon at the bottom right corner of a ClickUp workspace.
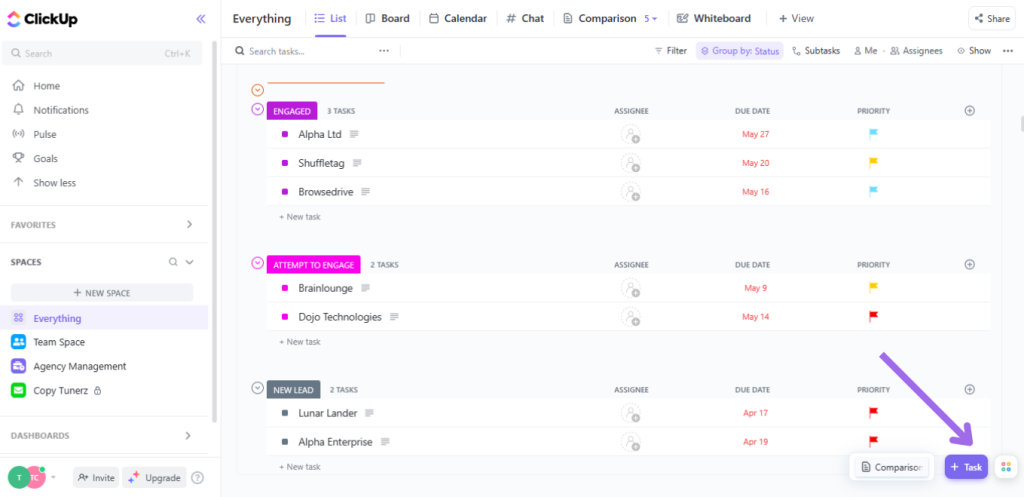
Example of multiple tasks in motion
Example of multiple tasks in motion
Within a task, you can create checklists, describe projects, set due dates, create sub-tasks, attach files, and more.
ClickUp task management hub is intuitive. It allows team leaders to view the update of specific tasks in real-time as team members work on them.
How to Avoid Over-Complications When Creating a ClickUp Workspace
A look at ClickUp’s hierarchical structure (or the above image of multiple tasks in motion) shows how easy it is to get lost in the maze.
To avoid that—to avoid getting lost in an endless sea of lists and folders, here’s how to arrange your ClickUp workspace using a horizontal or vertical hierarchy.
Horizontal Hierarchy
ClickUp’s horizontal hierarchy implies a simple layout.
The structure revolves around creating easy-to-navigate, straightforward workspaces using only views, custom fields, and tasks.
No long or bulky layouts. This hierarchy is perfect for individuals and close-knit teams looking to get simple tasks done quickly.
Vertical Hierarchy
Vertical hierarchy is the opposite of the horizontal.
Here we are talking about introducing spaces, folders, lists, and subtasks—a sophisticated workspace that can house hundreds or even thousands of projects.
ClickUp’s vertical hierarchy complex layout is perfect for large enterprises and big teams.
ClickUp App: A Brief Tour
Unlike most project management software, ClickUp’s user interface is feature-rich yet not jampacked.
Indeed, newbie project managers can get the hang of their ClickUp account by simply moving their mouse around.
But since we are here, let’s provide the handholding you need to master the UI real-fast.
Home & Inbox
Log into your ClickUp account, and you’ll find the “Home” button at the top left corner of the navigation pane; you can’t miss it.
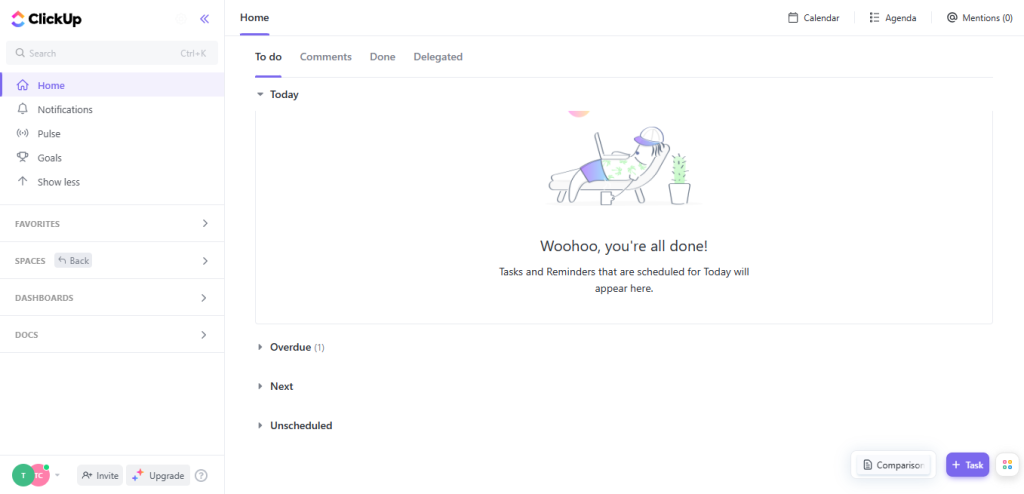
ClickUp’s home houses all your small tasks and projects. It provides an all-in-one view of your to-dos, comments, and subtasks.
Within the home page is the inbox section.
ClickUp’s inbox provides data on tasks and reminders scheduled for the day. Scroll down to filter your inbox based on criteria such as “Next, Unscheduled, and Overdue.”
Dashboard
ClickUp’s dashboard, located at the left corner of the navigation pane, gives you a high-level view of everything happening in your workspace.
You can use dashboards to create custom views such as bar, pie, or line chart, for an at-a-glance visual of your PM activities.

To create a dashboard, you will have to choose a template depending on what you want to track. These templates are only customary, so don’t feel limited.
Customizable cards (similar to drag-and-drop widgets) are the building blocks of ClickUp dashboards. And thankfully, ClickUp offers multiple cards across 9 categories.
Dashboard cards such as the number of tasks in progress, activity view, and workload by status make it easy for busy admins to get a bird eye view of a project’s progress.
Notification
Beneath the home button at the left corner of the navigation pane, you’ll find a notification center.
This is where all pending activities worth your attention are stored. From comments to chats, and tasks assigned to you, everything resides here.
You can sort through by choosing “assigned to me” or “@mentioned.”
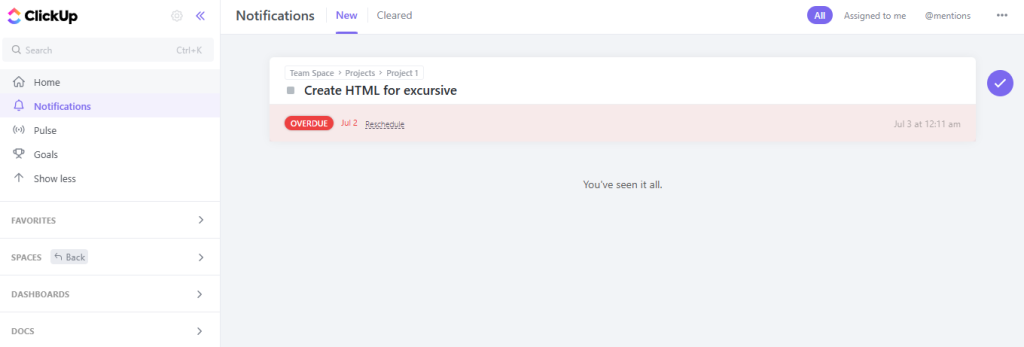
An overview of what ClickUp’s notification page looks like
ClickUps notification page is easy to navigate.
But unlike most project management platforms, ClickUp sends lots of notifications within and outside working hours.
You can stop the unsolicited notifications by using the “ellipsis…” at the top-right corner of the navigation bar to adjust and set custom notifications.
Pulse
Want to see who’s online on your ClickUp workspace and what they have been up to? Click on the “pulse” option at the lower-left corner of the navigation pane.
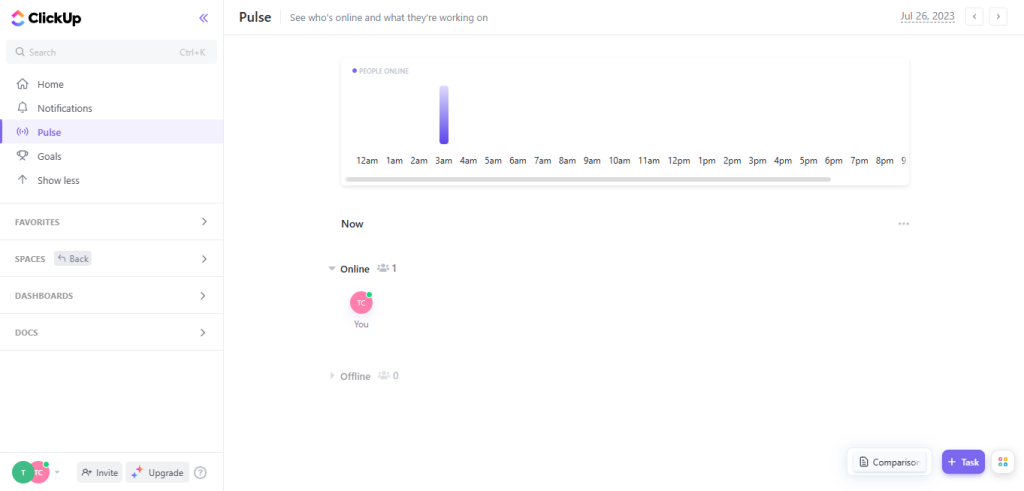
Workspace owners and admins use pulse to check and highlight employees’ performance data for different days. You can use it to see who’s online per hour or explore what specific team members are working on.
By clicking the “ellipsis…” icon shown each time you hover over the pulse button, you can set and update permission on the people that can access your pulse data.
Docs
ClickUp supports the creation of beautiful docs and wikis you can connect to your workflows and make data digestible.
The docs icon is at the navigation panel’s bottom left corner.
Click on the “+ Add New” icon, and you’ll be graced with an empty page housing all the tools you need to create infinitely customizable docs.
Some of the customization tools accessible via ClickUp docs include embed bookmarks, tables, nested pages, images, columns, etc..
Goals
Indeed, behind every goal are a couple of milestones that must be reached.
In an effort to ensure users can easily identify and document the milestones and objectives needed to achieve their goals, ClickUp offers a goal feature.
ClickUps “Goal” icon is located at the left corner of the navigation pane, beneath the Pulse option. Click on it, and you will be directed to a page similar to the image below.
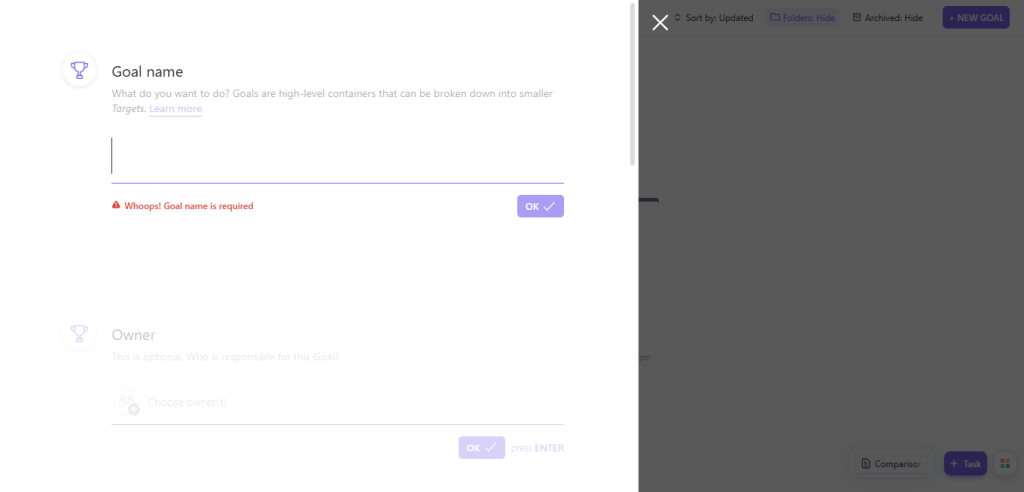
Fill in your details, goal name, team members, and a few other personal info, and you’ll be redirected to another page where you can add targets.
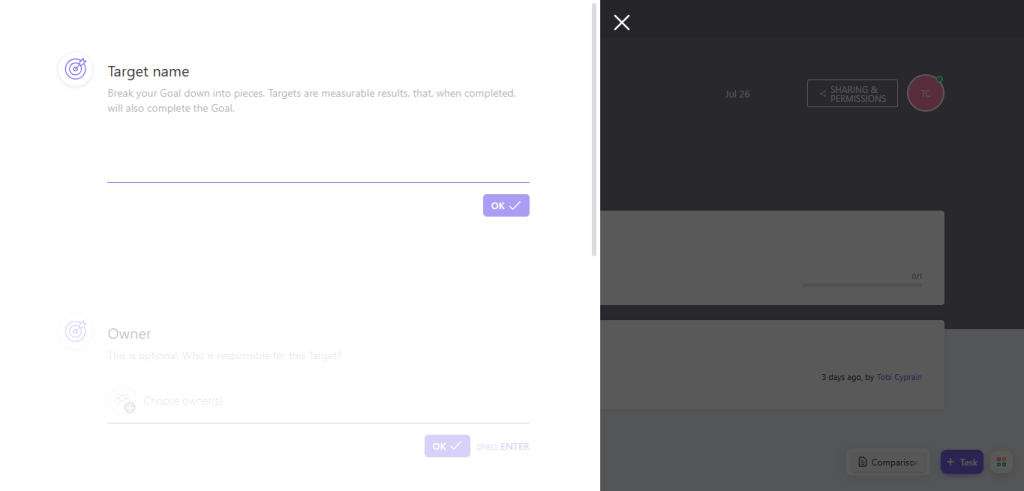
Targets help you break your goals into key objectives measurable using numbers, true/false variants, monetary values, or tasks.
At this point, we believe you’ve onboarded or have actionable ideas on how ClickUp works. If that’s the case, let’s look at some basic how-to guides with tips to help you find your way around ASAP.
How to Manage Lists
Lists houses all the tasks and subtasks needed to complete specific projects within a space.
To manage or edit existing lists, from the left corner of the sidebar, hover over the list you’d like to edit, then click on the ellipsis… icon.
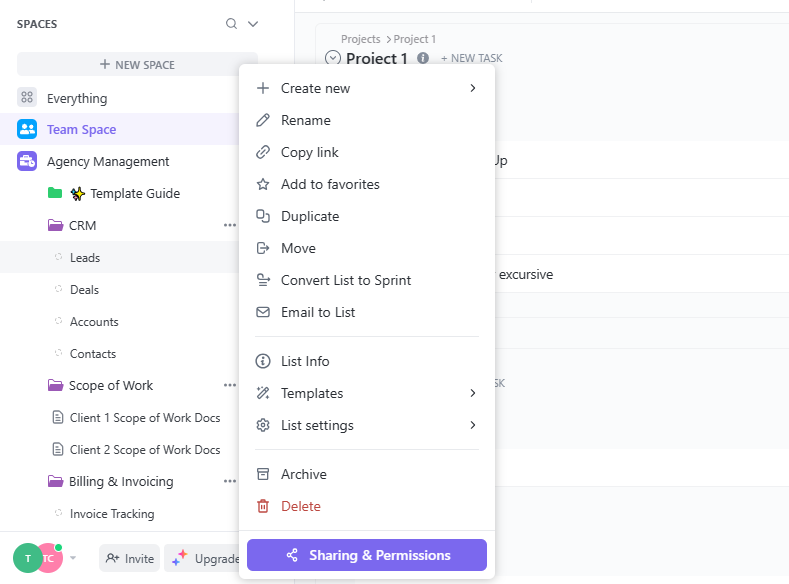
ClickUp’s list editing options are limitless.
You can use the “convert list to sprint” option to easily add the tasks in a list to sprint projects.
Busy admins can also hover around the “list setting” option to edit automation, custom fields, or statuses.
How to Add Tasks to a Project
To add tasks to a project, go to the bottom right of the sidebar and click on the “+ Task” icon.
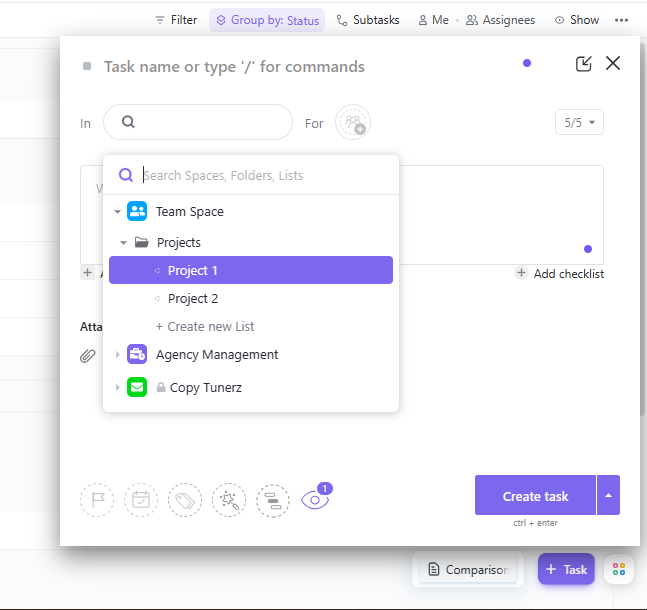
This automatically launches a quick task creation modal similar to the image above.
You can use the “search” element to find specific spaces within different projects. Find the project you’d like to add a task to, and all the other settings are as clear as day.
In case you feel lost, hover over any icon shown on the task creation model, and a self-explanatory tag will appear.
You can add dependencies, checklists, include watchers, assign tasks, add templates, edit tags, and do much more.
How to Add and Manage Columns
ClickUp’s drag-and-drop columns are the perfect design feature to create layouts that match your content.
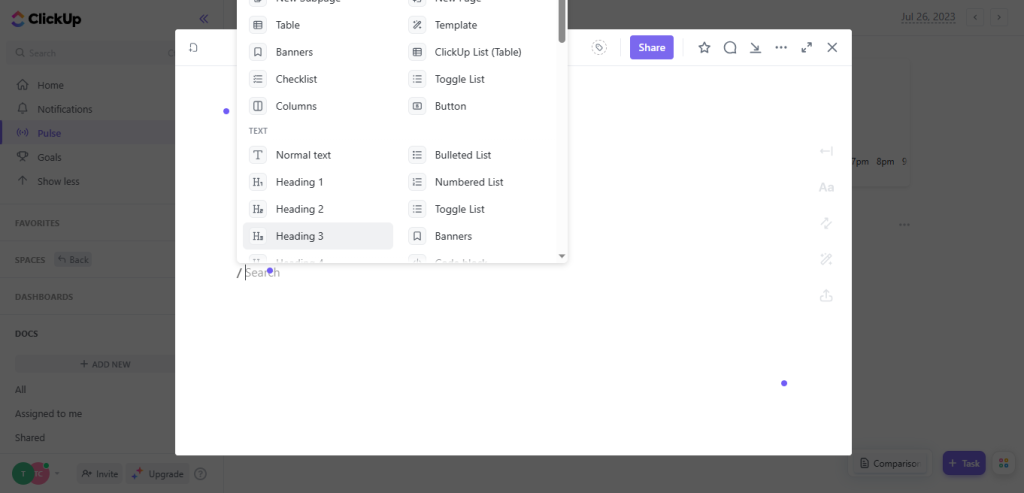
You can easily add columns on ClickUp docs.
Simply open a blank doc page and either click on the “+” close to the blank area, or type the “/” command into the doc, and a pleathora of editing options will open up.
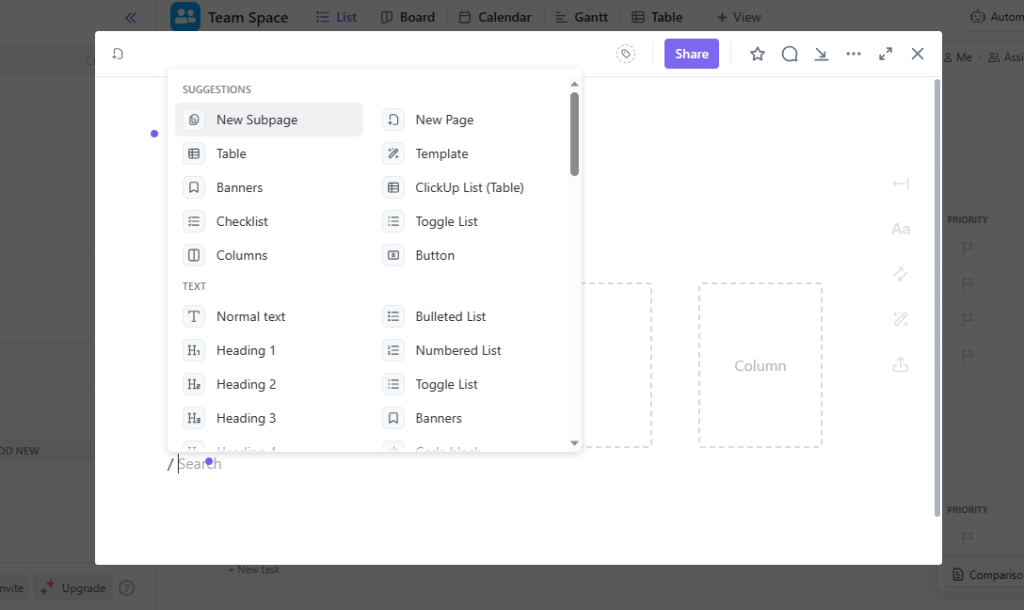
ClickUp column and other doc commands
Click on the column option, and you’ll be graced with a column variation menu that allows you to decide the number and width of each column.
Within each column, you can still use the “/” command to add rich formatting text, embed media, attach files, etc.
How to Change Views
ClickUp offers over 20+ distinct views, plus the possibility to create a custom view of choice.
To change your ClickUp view, open a project and find your way to the top of the navigation pane.
You’ll find a “+ View” icon. Click on it, and a pop-up similar to the image below will appear.
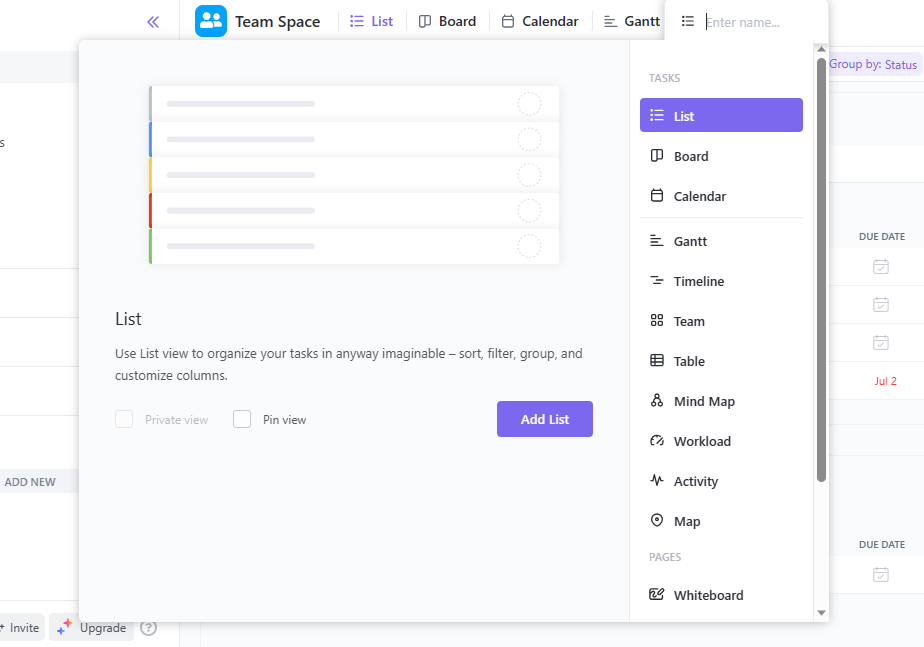
You’ll find many high-value views seasoned project managers use to navigate complex projects.
Note that the number of views you can access depends on the ClickUp plan you subscribe to.
How to Automate Tasks
Do you have too many things to do and very little time in a day? We can relate, and so can ClickUp.
ClickUp’s automation feature can make you 7x more productive. You just need the right recipes.
Use ClickUp to automate tasks by moving your mouse to the top-right corner of the navigation bar and clicking on the “automate” icon next to the “share” button.
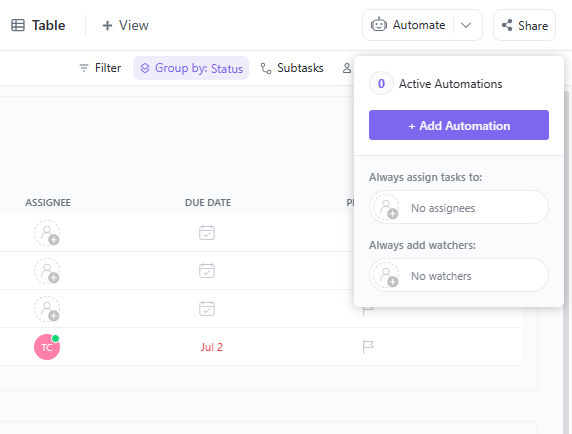
Click the “+ Automation” option in the pop-up that comes out to find a handful of custom recipes for automating ClickUp tasks.
You can automate tasks based on status, date, priorities, assignees, etc. You can also create custom automation with third-party apps within your workspace.
How to Add Clickapps
ClickUp apps, commonly referred to as ClickApps, are the backbone of the PM’s hub core functionalities.
It’s where you find the tools and flexibility needed to completely customize your (or your team’s) experience.
To add ClickApps, click on your profile app avatar at the bottom left corner of the navigation pane.
Select the “ClickApp” option, and you’ll be redirected to a feature-rich page where you will find multiple apps you can easily apply to specific spaces within your workspace.
Some apps within the ClickApp page include Clip screen recording tools, comment reaction, custom fields, dependency warning, docs home, giphy, etc.
How to add integrations
Adding integration to ClickUp is an easy way to boost collaboration amongst multiple team members and get projects to the finish line.
If you missed adding the integrations you need in your workspace during sign-up, don’t fret! You can do it now.
Integration on ClickUp happens in the “App center.”
Click on your profile avatar at the bottom-left corner of the navigation pane and select “App center.”
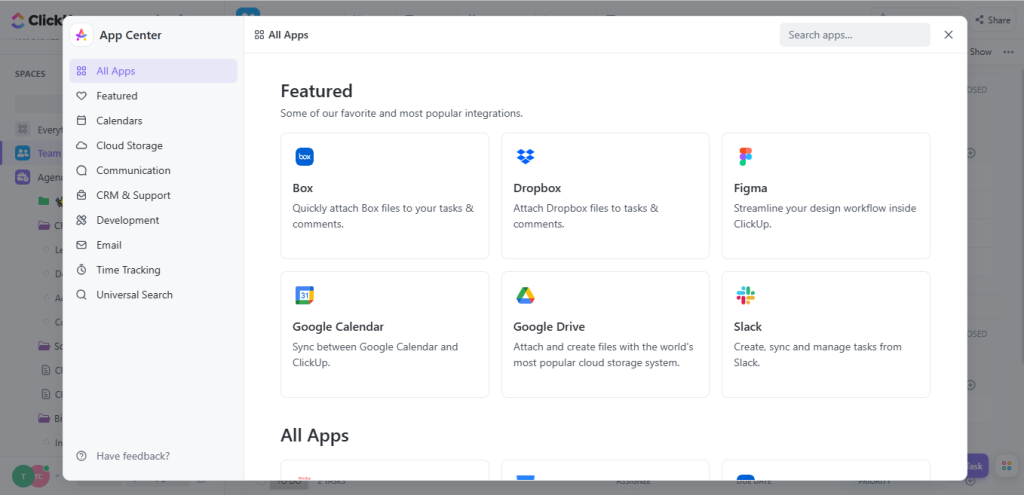
You’ll find an easy-to-navigate page highlighting over 20 integrations across 8 categories.
Click on the integration you want to add and input login details to enjoy seamless connectivity between apps.
How to add tasks to Favorites
Amongst the multitudes of tasks a project might require to reach completion, we all have a handful of tasks we fancy over others.
ClickUp favorite allows you to bookmark the workspace location you use frequently. From tasks to spaces, docs to dashboards, you can favorite anything.
To favorite a task, open the task and click the “eclipsis…” next to the share button.
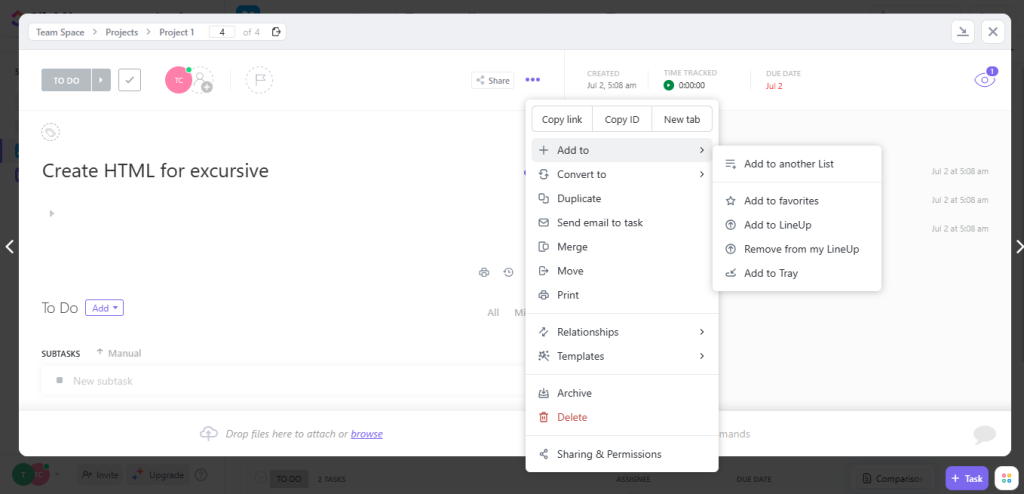
Hover over the “+ Add to” icon to find an “Add to Favorite” button. Click on it, and the task will be stared* with a golden yellow color and added to favorites.
Explore all favorite tasks by clicking on the “Favorites” tab on the left corner of the navigation pane.
Wrapping Up: ClickUp Tutorials
From the onboarding process to an overview of ClickUp’s dashboard, plus how-to guides and tips to turn beginners into power-users real quick, we’ve covered it all.
But even at that, experience tells us that power-users still find themselves between a rock and a hard when using the project management tool across devices.
Share This Post

Ada Rivers
Ada Rivers is a senior writer and marketer with a Master’s in Global Marketing. She enjoys helping businesses reach their audience. In her free time, she likes hiking, cooking, and practicing yoga.
Allow cookies
This website uses cookies to enhance the user experience and for essential analytics purposes. By continuing to use the site, you agree to our use of cookies.